
Below is a tutorial on how you can turn an ordinary box into a really
cool faux suede box that you can use to hold handmade stationery. This
is a multi-step project, so today I’ll show you how to make the box.
Coming up I’ll show you how to make the contents of the box.

Supplies Needed to Make the Box:
Purchased Cardboard Box
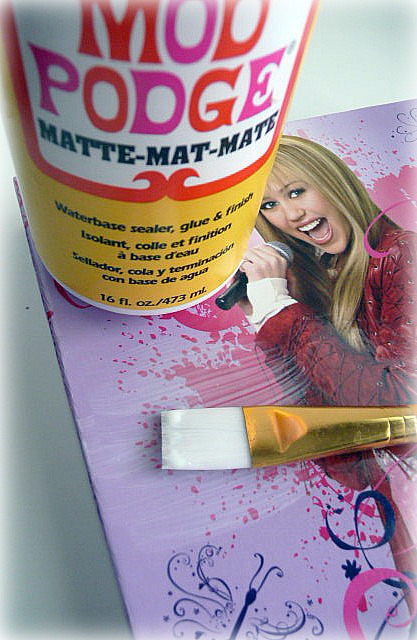
Mod Podge
Paper Cutter with Scoring Blade
Scissors
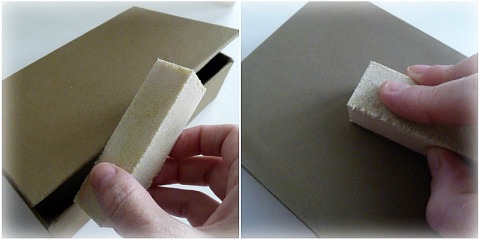
Sanding Block
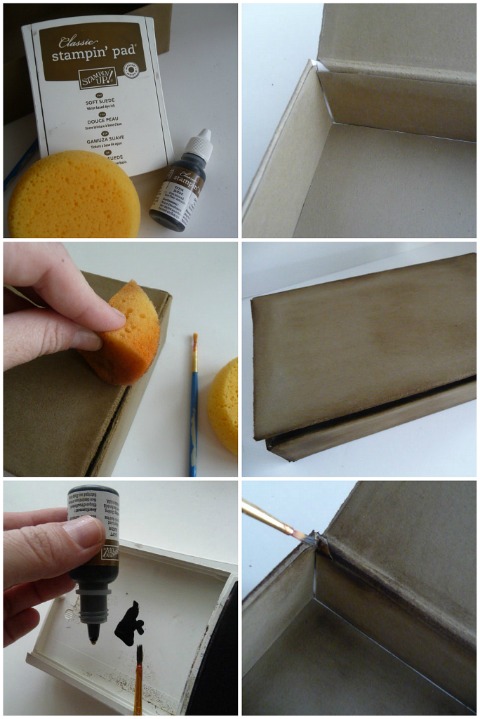
Stampin’ Up! Soft Suede Card Stock
Stampin’ Up! Soft Suede Classic Ink Pad
Stampin’ Up! Soft Suede Classic Ink Refill
Stampin’ Sponge
Sticky Strip
Crop-a-Dial
Stampin’ Up! Jumbo Eyelets
PART ONE
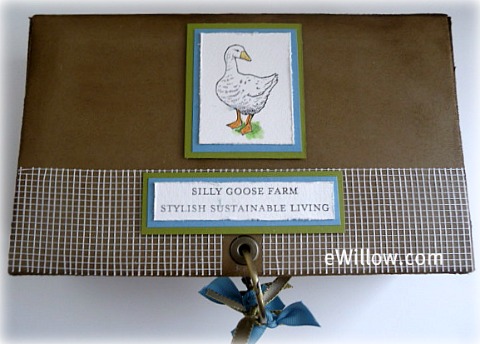
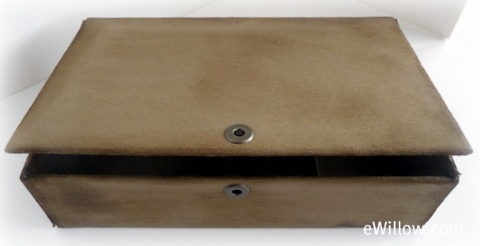
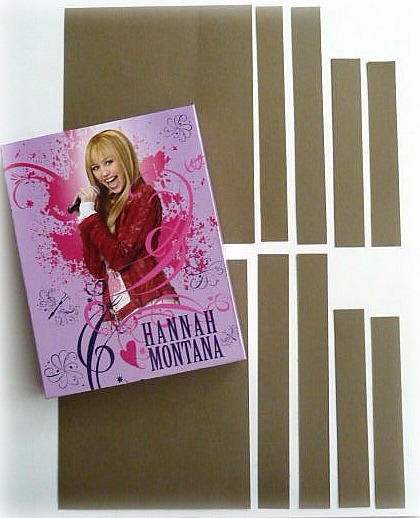
1) Start with a cardboard box, any size, any kind. I found this Hannah Montana box on clearance.

2) Since you will all be using different sizes and types of boxes,
I’m not going to list any cutting and scoring measurements. In the
photos below, you will see that you need to measure the lid, inside,
outside, and the bottom of your box. You will then need to cut pieces
of cardstock to fit each section.
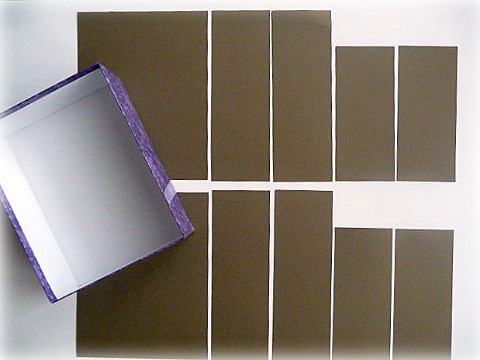
3) Paint a thin layer of Mod Podge over each section of the box and
attach each piece of cardstock to its corresponding section on the box.
4) Rub the sanding block all over the Stampin’ Up! Soft Suede
cardstock. The sanding technique will break the fibers of the paper and
give the paper the appearance of suede.
5) You’ll probably have a lot of “boo-boos” on your box. You know
what I mean…spaces where the paper didn’t meet up exactly, creating
areas of the box that aren’t covered with paper. Don’t worry! Grab
your ink, ink refill, and sponge, and get busy covering-up those spaces
with ink.
PART TWO
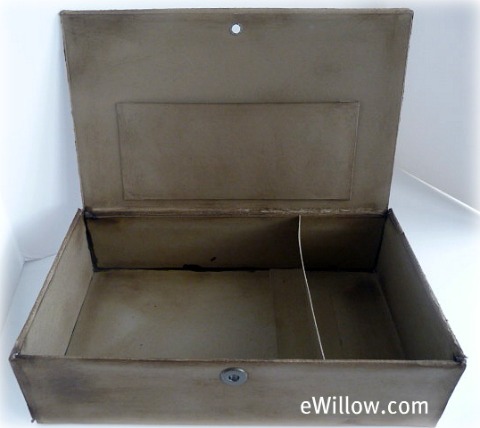
Okay, take a deep breath! We’re almost done! Now we are going to
make the inside divider piece and the pocket envelope on the inside of
the lid.
Once again, since you will all be using different boxes of different
sizes, I will just guide you in these steps without giving you exact
measurements.
1) To make the pocket envelope, cut a piece of cardstock to a size
that will fit on the inside of your box lid, making sure to leave an
extra 1/2″ on three sides. Score at 1/2″ on three sides and cut out the
bottom corners. Sponge cardstock with ink. Add sticky strip to the
three scored sides. Adhere to the inside of the box lid.
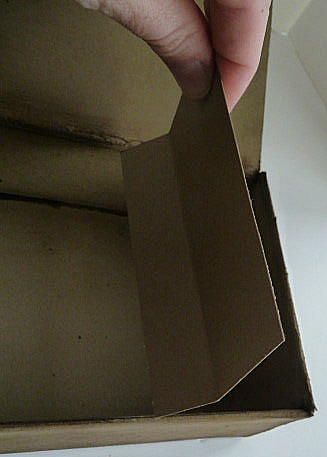
2) To make the divider that goes inside the box, cut a piece of
cardstock the length of the box and 1″ more than the depth of the box.
Score the cardstock at 1-1/8″ along the length of the cardstock.

3) Add Mod Podge along the scored edge and place the divider in the box.
PART THREE
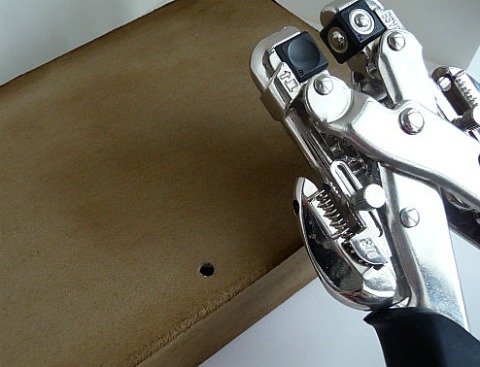
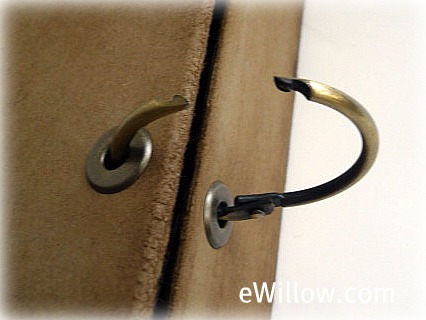
Now let’s add the eyelets.
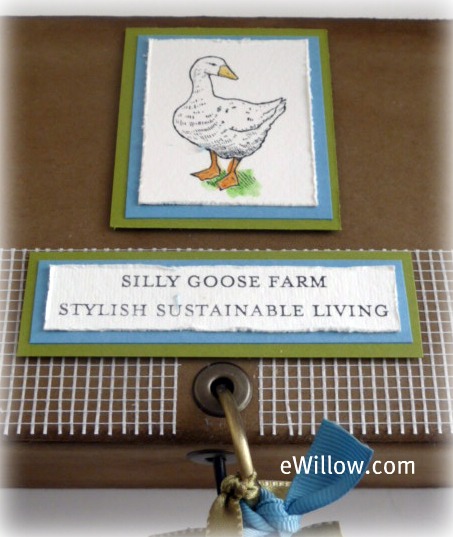
1) To add the eyelets, punch a hole in the top of the box and the
bottom of the box with the Crop-a-Dial and add eyelets. The placement
of the eyelets depends on the box you use. Here are photos for you to
reference.
My box lid didn’t close completely, so I wanted to make sure I made a
strong clasp. I didn’t want it to open and have all of the contents
spill.
I used a hinged jump-ring that opens and closes easily.
Add some fun ribbon, too.
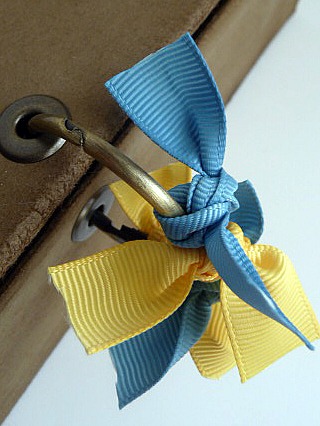
Decorate the lid. You’re done! Woo hoo! You did it!