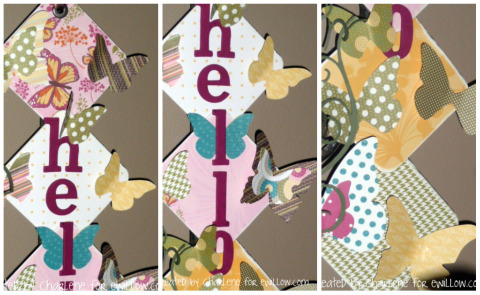
This project passed the test! When I showed it to my
daughters, they both asked me to make them one with their names for
their bedrooms. Impressing teenage girls is the most difficult thing
to do!
daughters, they both asked me to make them one with their names for
their bedrooms. Impressing teenage girls is the most difficult thing
to do!
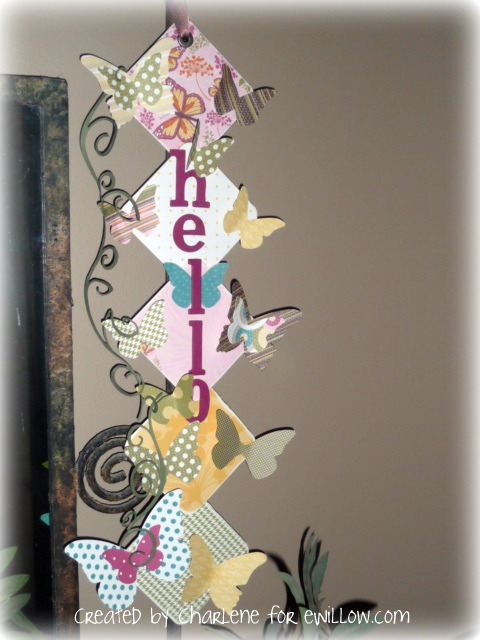
I used thin cardboard coasters for the back pieces. I
covered them with Stampin’ Up!’s “Sweet Pea” Designer Series Paper
Pack, and attached them at the corners with Mod Podge.
covered them with Stampin’ Up!’s “Sweet Pea” Designer Series Paper
Pack, and attached them at the corners with Mod Podge.
The “h e l l o” are chipboard letters that I painted with Stampin’ Up!’s craft ink in Rose Red. I adhered the letters to the coasters with Mod Podge.
I used my Sizzix Big Shot machine to die cut the
butterflies (Stampin Up!’s “Beautiful Butterflies” Bigz Die) and the
thin green vine (Sizzlits “Swirly” Decorative Strip Die.) Once again, I
used Mod Podge to adhere everything, but as you can see, I only adhered
parts of the butterflies and vine so they would be 3-D.
butterflies (Stampin Up!’s “Beautiful Butterflies” Bigz Die) and the
thin green vine (Sizzlits “Swirly” Decorative Strip Die.) Once again, I
used Mod Podge to adhere everything, but as you can see, I only adhered
parts of the butterflies and vine so they would be 3-D.
I topped it off with a large brad and some ribbon for hanging.
